18 Bridal Hairstyles with a Veil for Every Wedding Style
Finding bridal hairstyles with a veil that actually stay put through the ceremony, photos, and first dance is harder than most wedding blogs let on. The veil adds weight, the comb shifts if your updo is too loose, and a style that looked flawless on Pinterest can fall apart before cocktail hour.
The real trick is matching the veil type to the hairstyle structure. A cathedral veil needs a secure base. A birdcage veil works better with sleek, polished shapes. And loose romantic waves pair best with lighter, shorter veils that move with your hair instead of pulling against it.
This list covers 18 specific styles, each paired with the veil type that suits it best. Whether you want a low bun, a braid, a half-up style, or full curls, there is a combination here that works with your hair length, texture, and wedding vibe.
1. Low Textured Chignon with Cathedral Veil
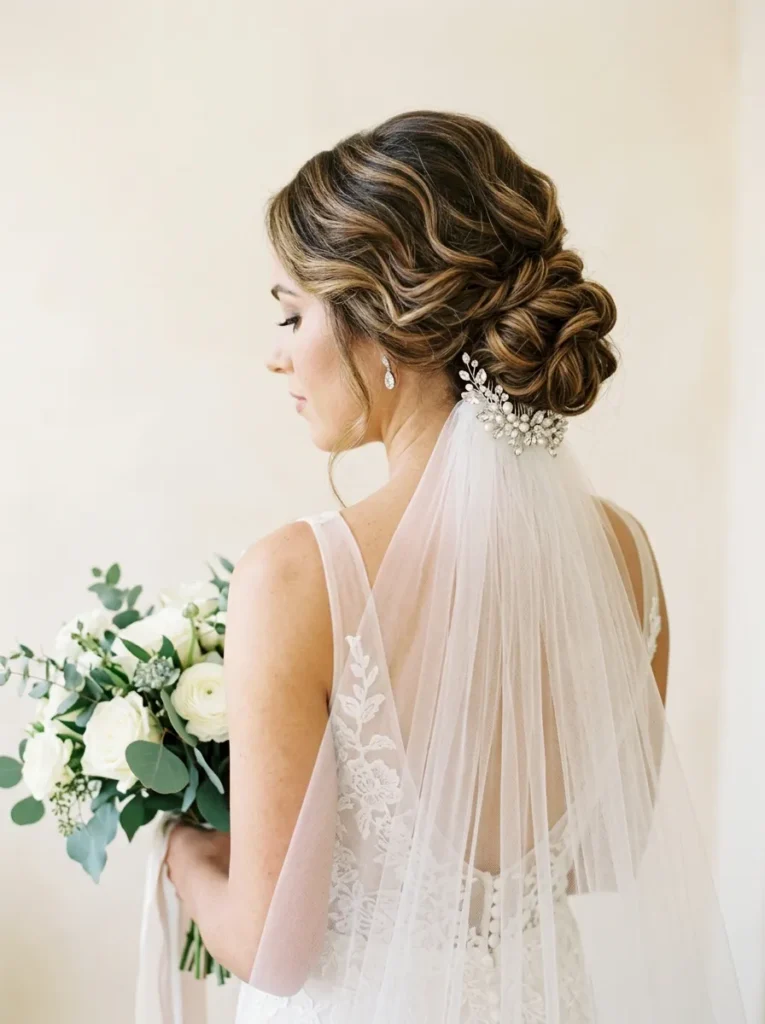
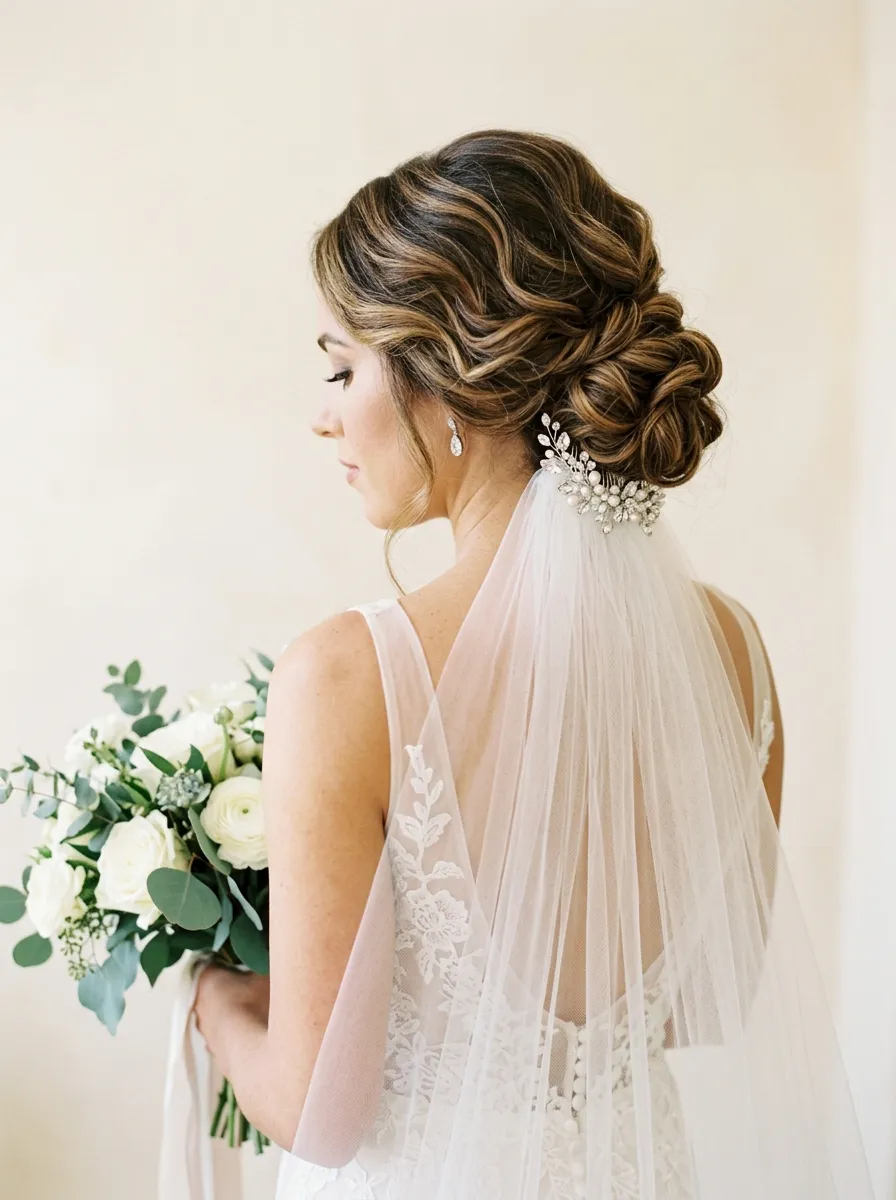
A low textured chignon sits right at the nape and gives a cathedral veil a solid anchor point without looking stiff. The key is building texture first with a good sea salt spray or dry shampoo before you even start pinning.
What makes this pairing work:
• The chignon’s low placement keeps the veil comb stable all day
• Loose face-framing pieces soften the overall look
• Works on straight, wavy, or lightly curled hair
I’ve seen brides skip the texture step and end up with a bun that looks flat in photos. Give your hair some grip before twisting, and the finished shape holds dimension for hours.
2. Soft Loose Waves with Fingertip Veil
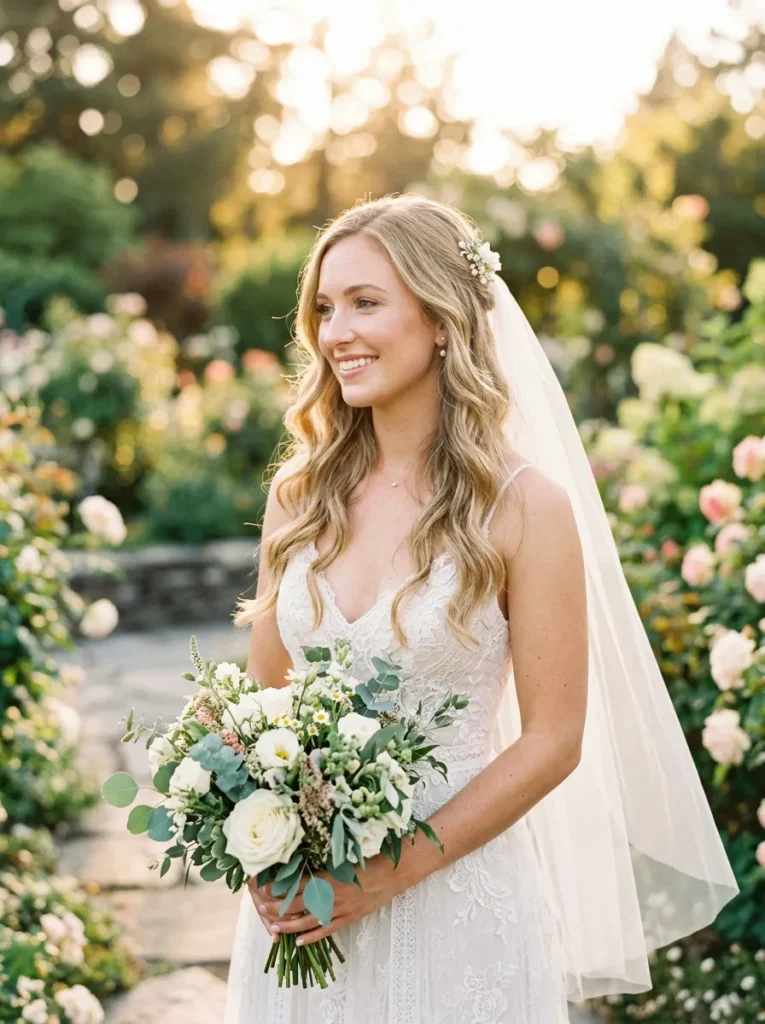
Brides with naturally wavy or curly hair often fight their texture on the wedding day, but soft loose waves are one of the easiest bridal styles to pull off. A fingertip veil lands right at your hips, light enough that it moves with your hair instead of dragging it down.
Curl with a 1.25-inch barrel, always away from your face. Let each curl cool completely before brushing through with your fingers. Pin the veil comb below the crown, angled slightly downward so it catches under a few layers of hair. A medium-hold hairspray on the finished waves keeps them from going limp during an outdoor ceremony.
3. Classic French Twist with Birdcage Veil
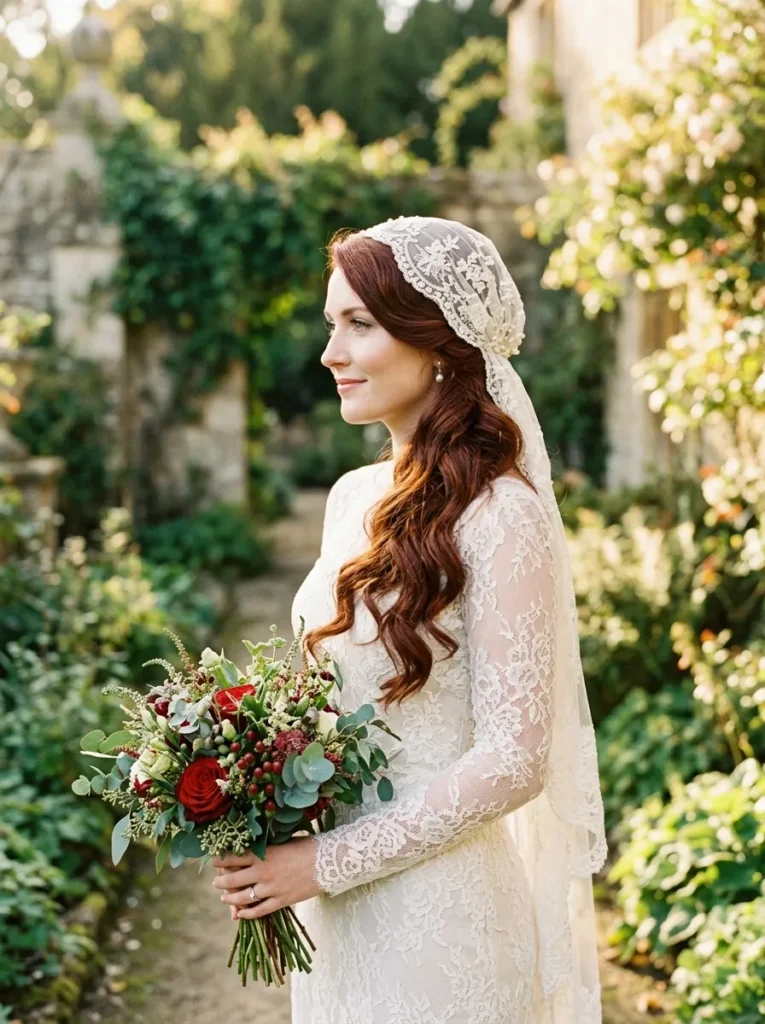
The French twist is one of those styles that photographs like nothing else. It gives you a clean vertical line up the back of your head that looks polished from every angle, and a birdcage veil adds a vintage edge without hiding the structure.
Start with smooth, blown-out hair. Gather everything to one side, twist upward, and pin vertically along the roll. Tuck the ends in cleanly. The birdcage veil clips to the side, usually above your temple or behind one ear. If you love romantic bridal updo ideas, this one feels timeless without being overdone.
4. Braided Crown with Blusher Veil
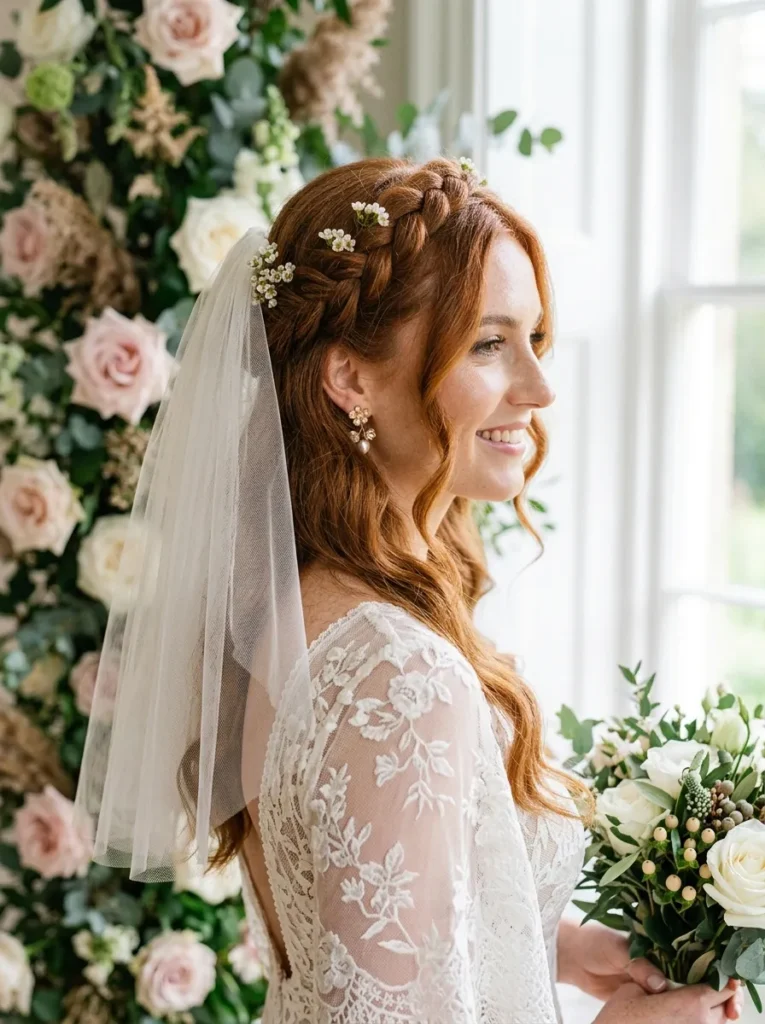
Most people assume a braided crown only works for boho weddings, but when you pair it with a short blusher veil, it suddenly reads as classic bridal. The braid sits like a natural headband and gives the veil comb a sturdy base to grip.
Dutch braid on each side, starting from above the ear. Cross them over the top and pin securely with bobby pins that match your hair color. Tuck the ends underneath the opposite braid. The blusher veil attaches at the back of the crown, right where the braids cross. Thick hair holds this shape on its own, but fine hair benefits from a little backcombing at the roots before you start braiding.
5. Voluminous Hollywood Curls with Chapel Veil
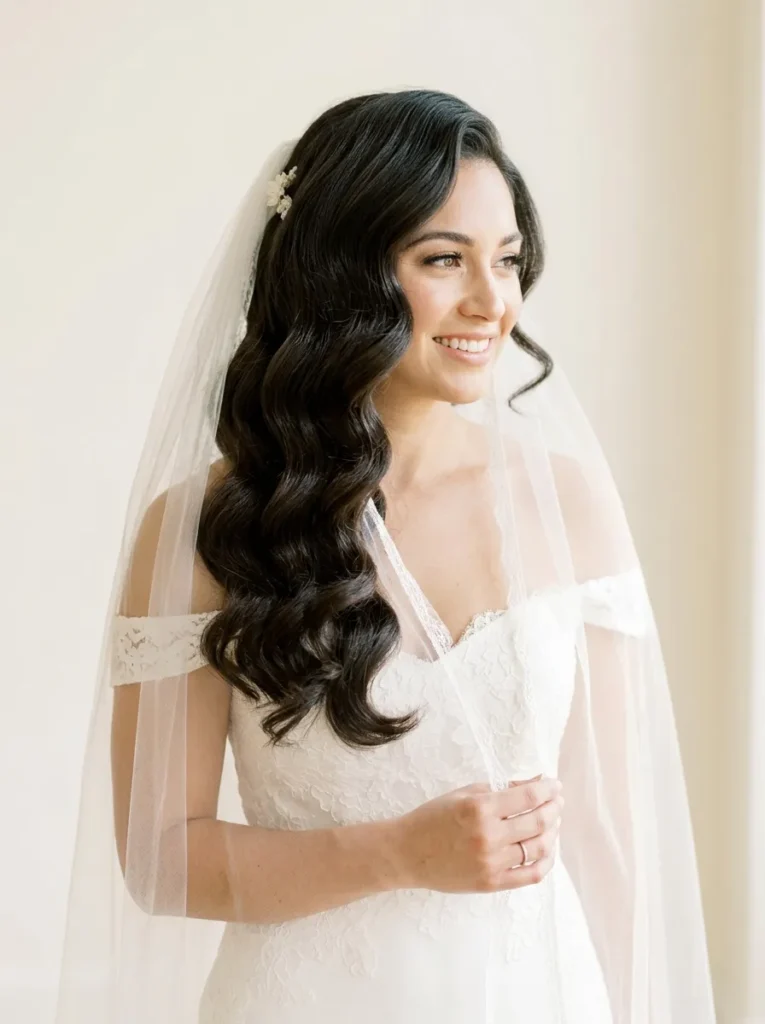
There is a common belief that big, bouncy curls are too heavy to pair with a veil, but a chapel-length veil actually drapes beautifully over voluminous curls because the curls create natural separation and airiness underneath the tulle.
Set your curls with hot rollers rather than a curling iron for maximum volume and longevity. Let them cool completely. Brush through gently with a boar bristle brush to get that old Hollywood S-wave pattern. Pin the veil comb at the crown and let the tulle fall over the curls. This combination works best on thick, coarse, or naturally wavy hair that holds curl well.
💡 Styling Tip
Hot rollers give longer-lasting volume than a curling iron because the heat sets the curl from the inside out. Velcro rollers at the crown add extra lift where the veil comb sits.
6. Sleek Low Bun with Mantilla Veil
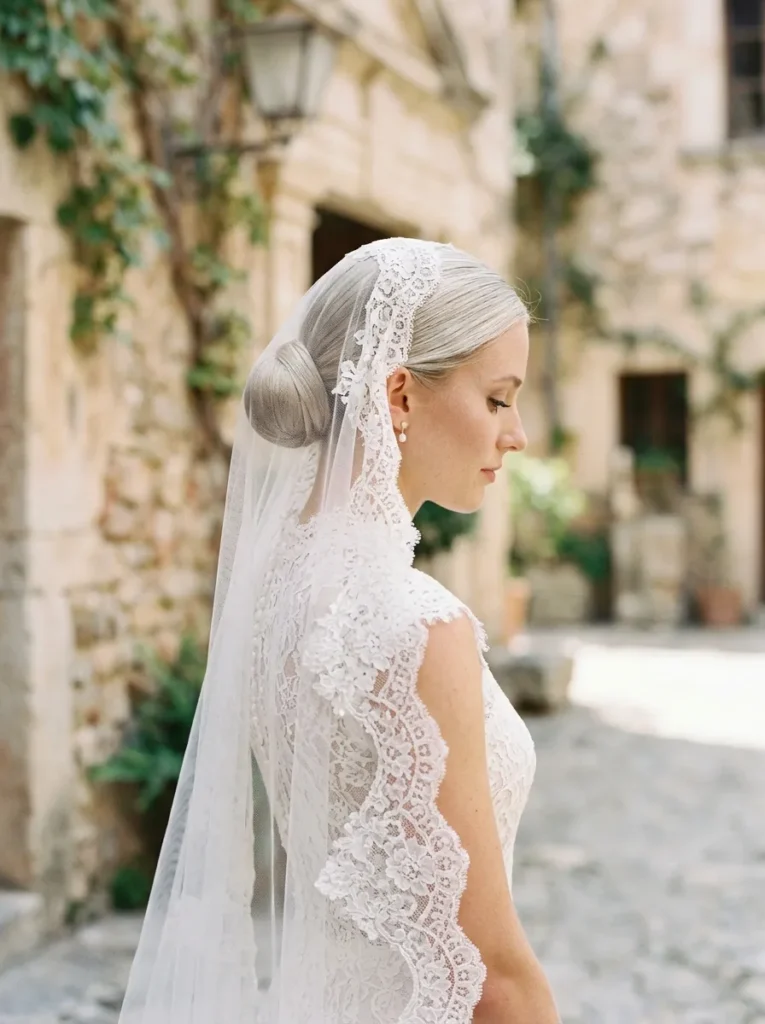
Start by flat ironing small sections until your hair is completely smooth. Apply a lightweight serum to kill any flyaways. Gather your hair into a low ponytail, twist it into a tight bun, and pin flat against the nape.
The mantilla veil drapes directly over your head without a comb, so the bun needs to sit low enough that it does not create a bump under the lace. Bobby pins along the edge of the veil keep it from slipping. This is one of the most elegant pairings for anyone drawn to low bun hairstyles with a traditional bridal feel.
7. Half-Up Twisted Pullback with Elbow Veil
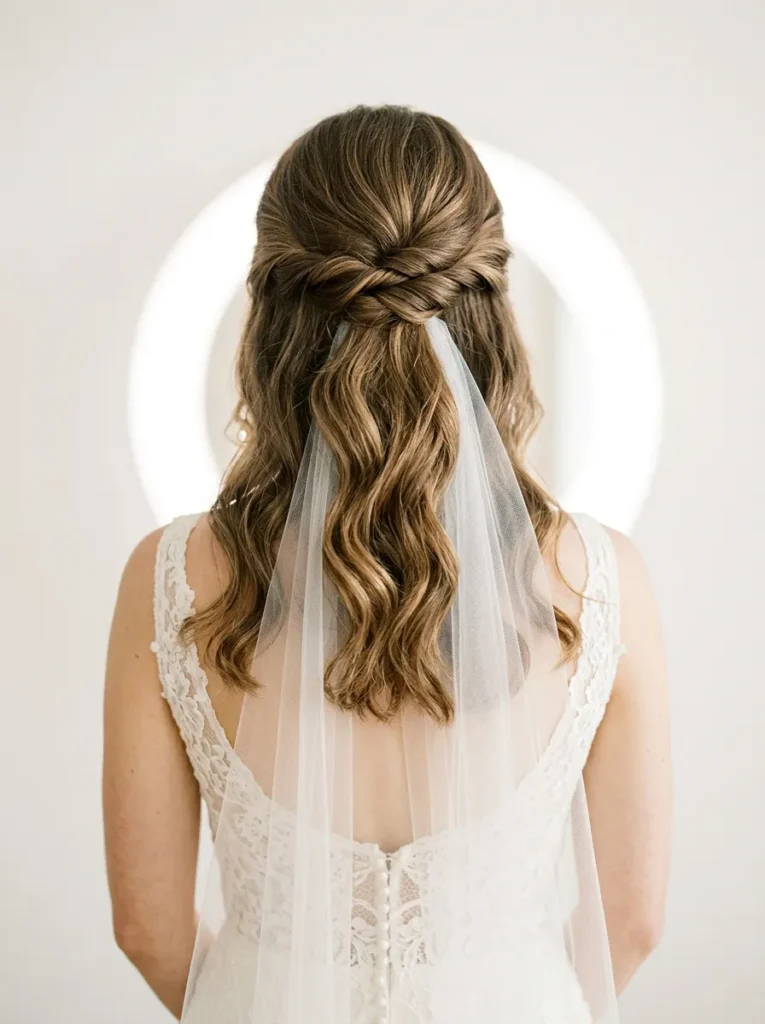
Fine hair often looks thin in a full updo, and that is the exact reason a half-up twisted pullback works so well. You keep the volume from your loose hair while adding structure on top where the veil attaches.
Take two sections from your temples, twist each one loosely toward the back, and pin them together below the crown. Leave some volume at the top by gently pulling the twists apart with your fingers. The elbow-length veil tucks under the twist point with a small comb. The rest of your hair can stay straight, wavy, or curled depending on the look you want.
8. Romantic Side Sweep with Juliet Cap Veil
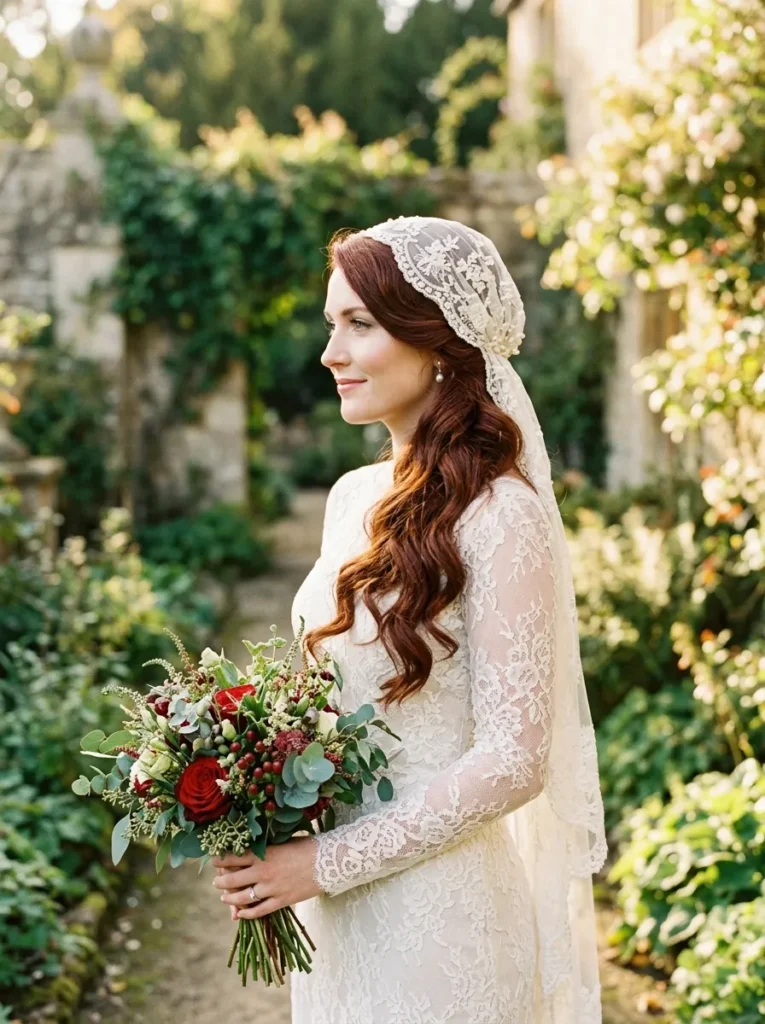
The wrong way to do a side sweep for a wedding is to push all your hair to one side and hope for the best. It slides back within 20 minutes. The right way involves pinning a hidden row of bobby pins in an X pattern behind one ear, then draping and pinning over that invisible foundation.
A Juliet cap veil wraps around the back of your head like a fitted cap and works perfectly here because the side sweep leaves the crown exposed. Curl the swept side loosely for movement. This pairing is especially flattering with elegant updo hairstyles for long hair that lean toward old-world romance.
Hair draped loosely to one side with no foundation pins. Slides back to center within 20 minutes and won’t hold a veil comb.
X-pinned foundation behind the ear locks the sweep in place. Juliet cap veil sits flush against the crown with zero slipping.
9. Pinned Curls Updo with Pearl-Edged Veil
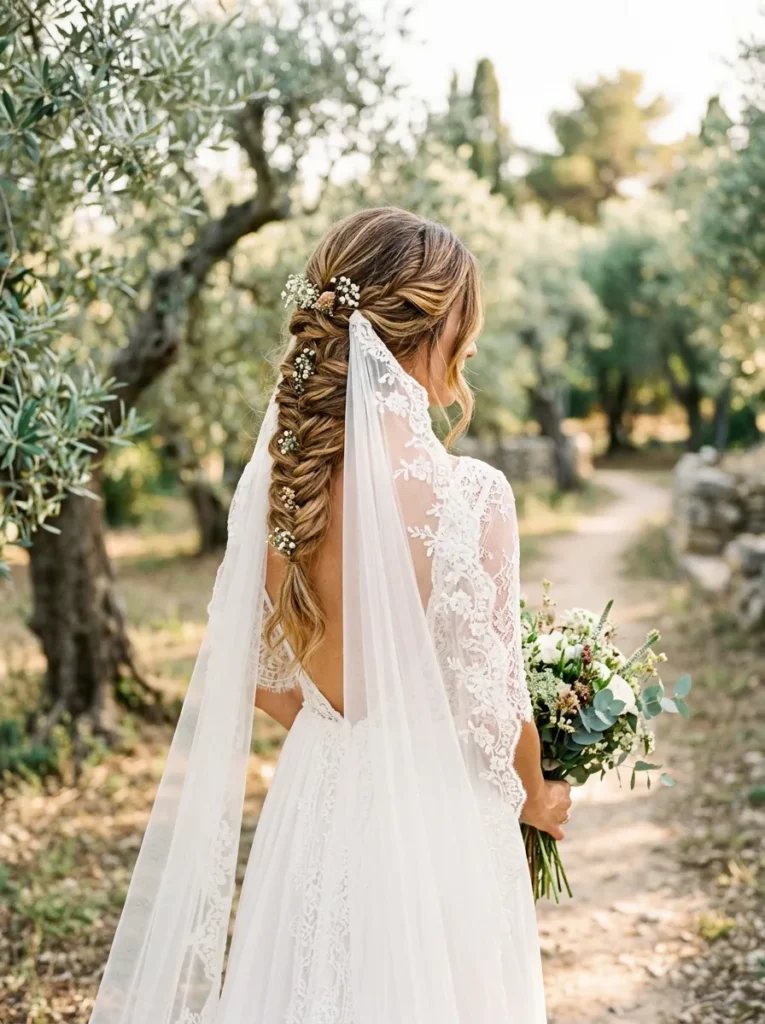
Think of this as the more relaxed cousin of a structured chignon. Instead of twisting hair into a single shape, you curl individual sections and pin each one loosely at the back of your head, overlapping them until the whole thing looks intentionally undone.
Compared to a traditional chignon that sits tight and smooth, the pinned curls updo has visible texture and movement that makes it look softer in photos. A pearl-edged veil adds enough sparkle to dress it up. Use medium-weight bobby pins and cross them for extra hold. This works on hair that has been second-day washed, because the natural oil gives the pins something to grip.
10. Messy Boho Bun with Draped Veil
One simple rule makes or breaks this style: the messiness has to be intentional. Pull out face-framing pieces before you start the bun, not after. That way you control exactly which strands hang loose and which stay tucked in.
Gather your hair into a mid-height bun, leaving it slightly unfinished. Pull small pieces from the bun to add volume and softness. A draped veil, which is a single layer of tulle pinned loosely at the back instead of on a comb, works here because it matches the relaxed mood. This is a natural fit if you already love boho bridal hairstyles with a laid-back feel.
11. Slicked-Back Bridal Ponytail with Short Veil

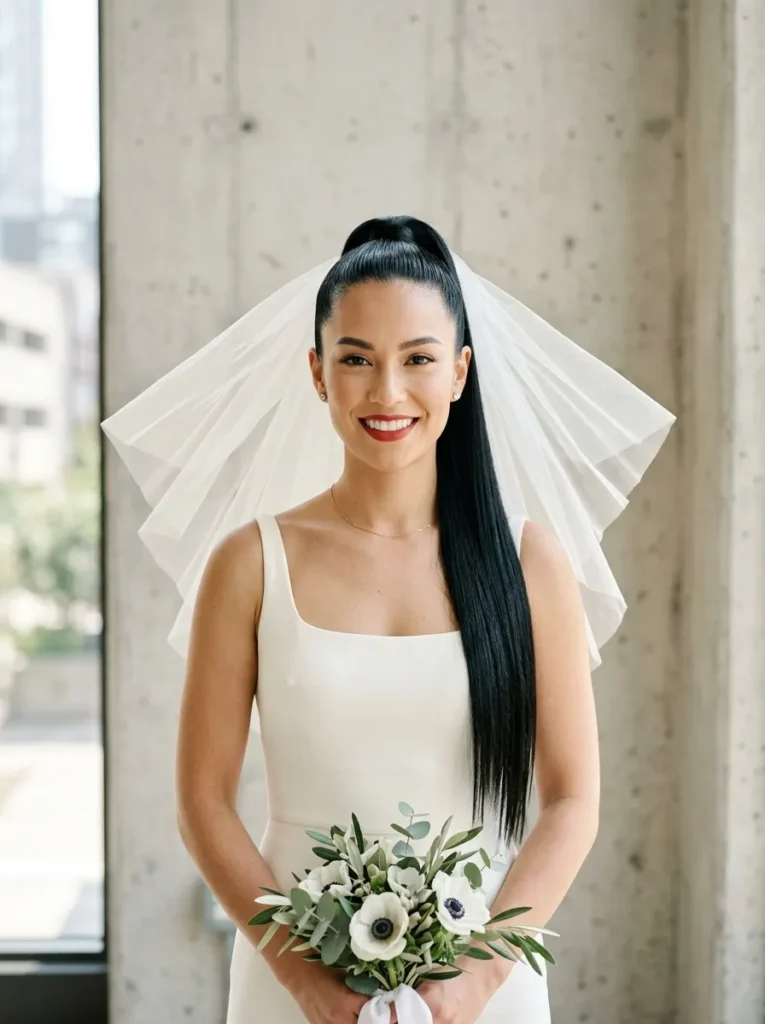
A high ponytail at a wedding sounds simple, but the polished version takes some effort. The payoff is worth it. You get a clean, modern bridal look that shows off your face, your earrings, and the back of your dress all at once.
Smooth everything back with a strong-hold gel or pomade. Secure the ponytail high and tight with an elastic, then wrap a small section of hair around the band to hide it. Pin a short flyaway veil behind the ponytail base. The veil stays short so it fans out behind you rather than tangling with the ponytail length.
What you need
12. Double Dutch Braids into Low Bun with Veil Comb
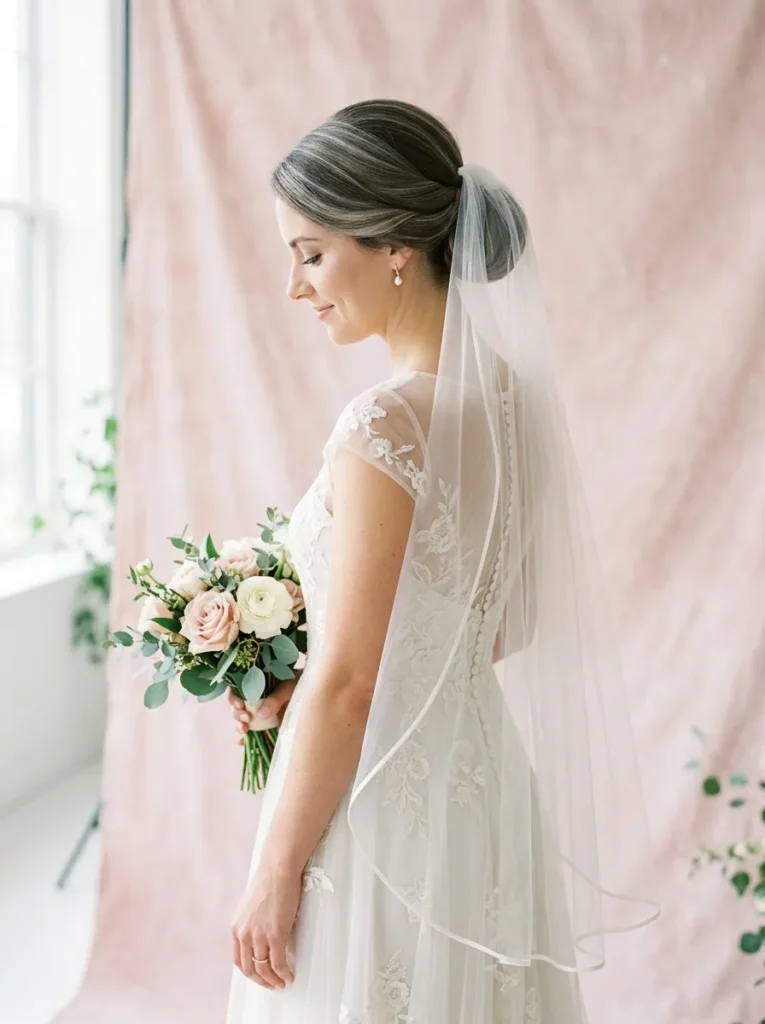
Humidity and outdoor summer weddings destroy most bridal styles, and that is exactly where a double Dutch braid base saves you. The braids lock your hair in place, and the low bun at the bottom keeps everything neat even when the weather does not cooperate.
Part your hair down the middle. Dutch braid each side, adding hair as you go. When you reach the nape, combine both braids into a low bun and pin securely. Slide the veil comb into the top of the bun. If you enjoy braided hairstyles for long hair, this bridal version holds up through a full day of dancing.
13. Soft Ballerina Bun with Waltz Veil
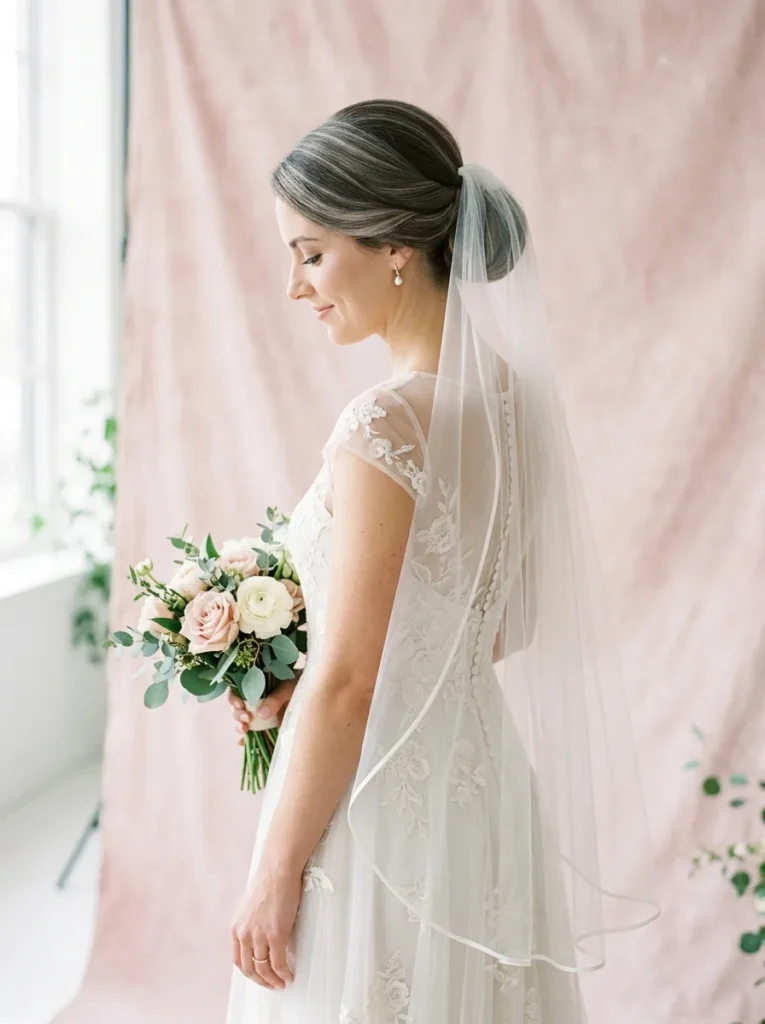
A perfectly round ballerina bun sits higher than a chignon, usually at the middle of the back of your head. When it is done right, it looks smooth but not severe, with a slight softness at the edges that keeps it bridal rather than ballet-class strict.
Use a hair donut for fullness if your hair is fine or medium thickness. Wrap your hair around the donut, tuck the ends in, and pin in a circle. Loosen tiny pieces around the bun with the tail end of a comb for a softer shape. A waltz-length veil, which falls to your fingertips, keeps the focus on the bun without overwhelming it. In my experience, second-day hair wraps around the donut more smoothly than freshly washed hair.
14. Vintage Finger Waves with Birdcage Veil

Wedding morning, and the glam squad is running 30 minutes behind schedule. Finger waves sound like they take forever, but a stylist who knows what they are doing can set the front section in under 15 minutes with a flat iron and sectioning clips. The rest of your hair can stay smooth or pinned into a low roll at the nape.
The birdcage veil frames the waves beautifully, sitting over one eye or across the forehead. Pin it behind the ear on the opposite side of your deeper wave pattern. This combination reads as 1920s glam without looking like a costume.
Set finger waves with a flat iron using the S-wave clamp technique for speed and control.
Pin each wave with a duckbill clip while it cools so the shape sets before you remove the clips.
Using too much product before setting. Heavy gel makes the waves crunchy instead of smooth.
Brushing through the waves too soon. Let them cool fully or they flatten out instantly.
15. Loose Fishtail Braid with Floral Veil
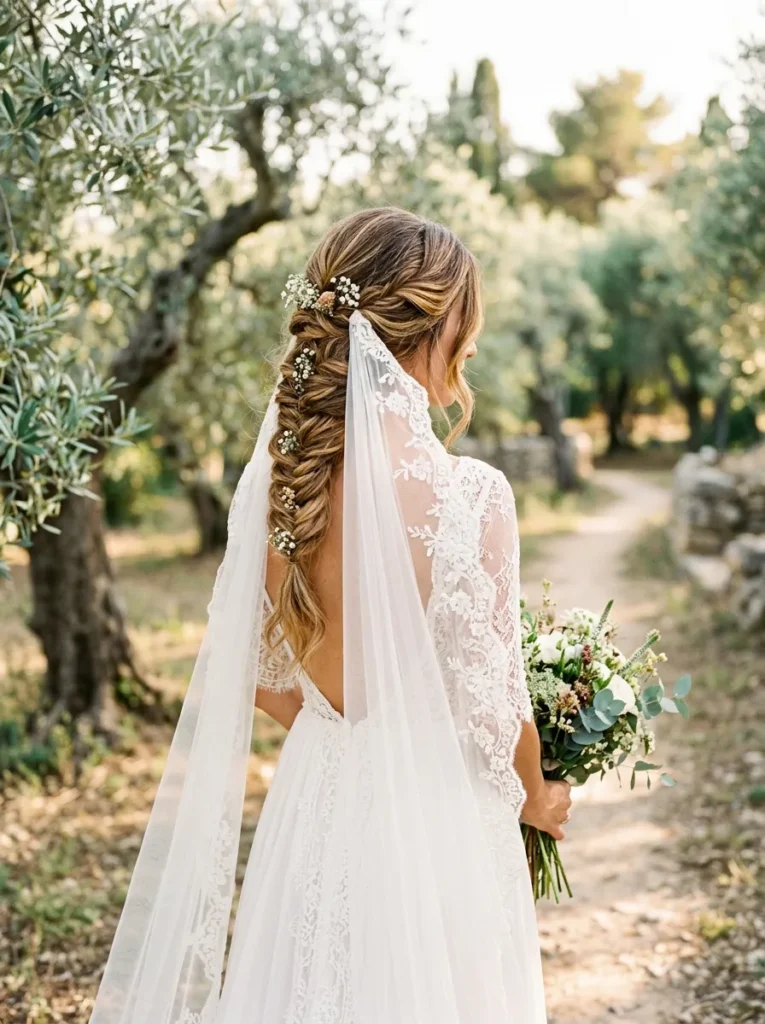
One small detail changes everything with a fishtail braid: pull the edges apart after you finish braiding. An unpulled fishtail looks thin and tight. A loosened one looks thick, textured, and bridal.
Braid your hair to one side in a loose fishtail, securing the end with a clear elastic. Gently tug the outer loops to widen the braid. A floral veil, which has small embroidered flowers along the edge, attaches at the top of the braid with a flat comb. Keep the flowers light and scattered so they complement the braid texture rather than competing with it. This works especially well on highlighted or balayage hair because the braid weave shows off the color variation.
16. Twisted Half-Up with Drop Veil
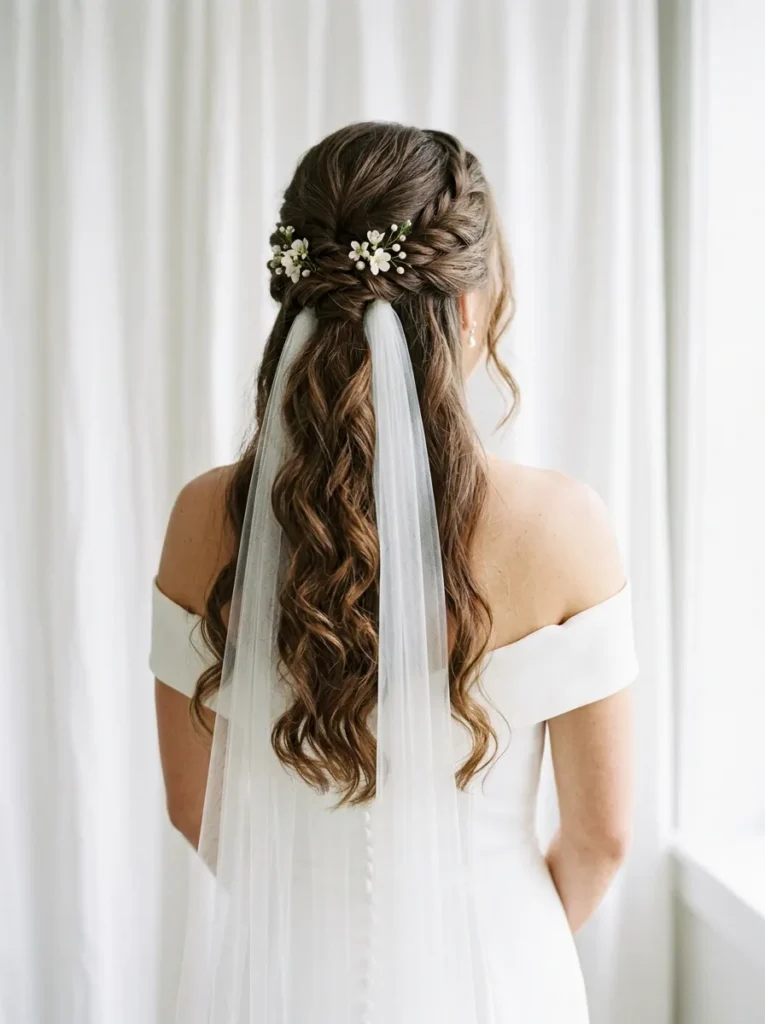
Pull two wide sections from your temples, twist each one two full rotations, and pin them at the back of your head right at the crown. Leave the rest of your hair loose. That is the whole style. The simplicity is what makes it work.
A drop veil clips right at the twist point and falls straight down your back like a curtain, which means it does not interfere with the loose hair underneath. This is the go-to for brides who want their hair mostly down but still want a veil moment. Add soft curls to the bottom half for movement, or leave it straight for a more modern finish.
17. Polished Low Knot with Lace-Trimmed Veil
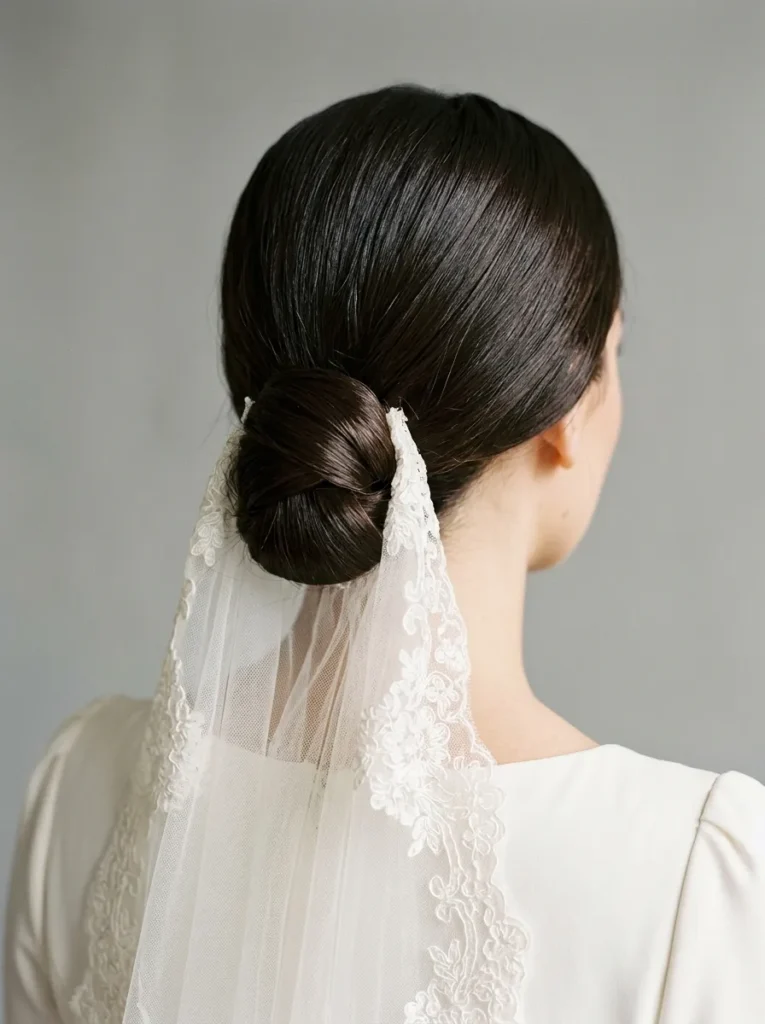
Some brides assume a low knot is a bun by another name, but the construction is different. A knot wraps and tucks the hair without twisting it into a coil, which gives it a flatter, more sculptural shape against the back of your head.
Smooth your hair into a low ponytail. Split it into two sections, cross them over each other, and tuck the ends underneath. Pin everything flat. A lace-trimmed veil pairs here because the knot is minimal enough to let the lace edge be the detail that stands out. Finish with a shine spray for a polished, editorial look.
Smooth hair back into a low ponytail at the nape. Apply serum for a sleek base.
Split the ponytail into two equal sections and cross one over the other.
Tuck the ends underneath the knot and pin flat against your head with U-pins.
Attach the lace-trimmed veil comb above the knot and finish with shine spray.
18. Cascading Curls with Two-Tier Veil
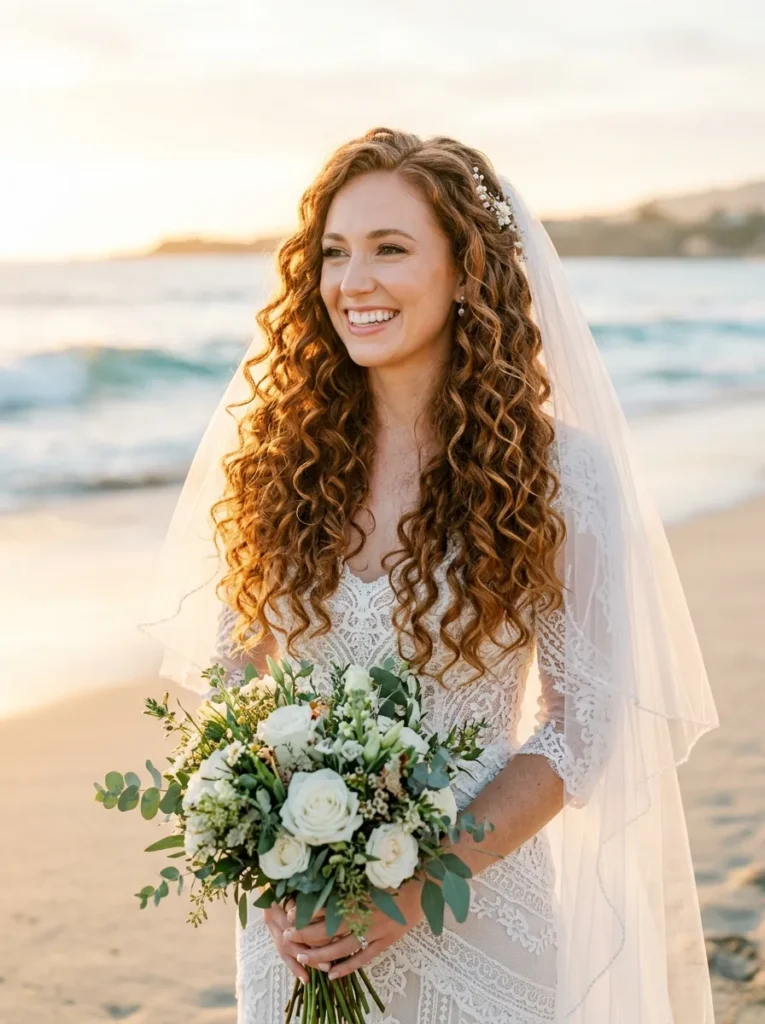
Side by side, cascading curls and a standard curly blowout look similar. The difference is direction. Cascading curls are all curled away from the face and layered so the curls at the front are tighter and the ones toward the back are looser, creating a waterfall effect.
A two-tier veil has a shorter blusher layer and a longer layer underneath. This pairing works because the blusher frames your face during the ceremony and flips back to reveal the curls underneath. Use a 1-inch barrel for the front curls and switch to a 1.5-inch barrel for the back. Set with a flexible hold spray so the curls bounce rather than crunch. This is one of the most photogenic veil looks because every angle shows something different.
Conclusion
Your wedding hairstyle and veil should work together, not against each other. The right pairing depends on your hair texture, your dress neckline, and how much hold you need for a full day of celebrating. Whether you go with a structured updo, a loose braid, or hair completely down, matching the veil type to the style is what keeps everything looking intentional. Save this list of bridal hairstyles with a veil so you have it ready for your stylist consultation, and pin your favorites for quick reference on your wedding planning board.
Frequently Asked Questions
When should I put my veil on?
After the style is finished and pinned. Slide the comb in last so it does not disturb the shape, and have someone check the back before photos.
Which veil length suits an updo?
A fingertip or chapel veil pairs well with most updos. Short birdcage veils suit sleek bobs and side sweeps, while cathedral veils need a secure low base.
How do I keep a veil from slipping?
Anchor the comb with U-pins crossed through the base, and add a small braid or twist behind the comb for grip. Second-day hair holds a veil better than freshly washed hair.
Can I wear a veil with loose waves?
Yes. Pin the veil comb above the crown and let the waves fall around it. Keep the front sections soft so the veil frames the face instead of flattening it.
Should the veil match my dress?
Match the veil’s edge to the dress details, lace with lace and plain with plain. The colour should sit close to the dress, ivory with ivory and white with white.