15 Alt and Grunge Updo Styles for Edgy Everyday Looks
Alt and grunge updo styles work because they refuse to sit still and behave. The hair looks pulled together and pulled apart at the same time, like you spent five minutes on it and also like you didn’t try at all. That contrast is the whole point of the alt and grunge look, and it’s why these styles hold up so well for daily wear instead of only special occasions.
Most updo tutorials chase smoothness. Every strand tucked, every flyaway tamed. Grunge works backward from that. A little texture, a slightly loose section, a safety pin instead of a hidden bobby pin. None of it needs a mirror check every hour.
These 15 styles cover buns, braids, twists, and wrapped ponytails, built for hair that’s already a little dirty, a little wavy, or tired of being straightened every morning. Pick a texture, grab a few pins, and skip the smoothing spray.
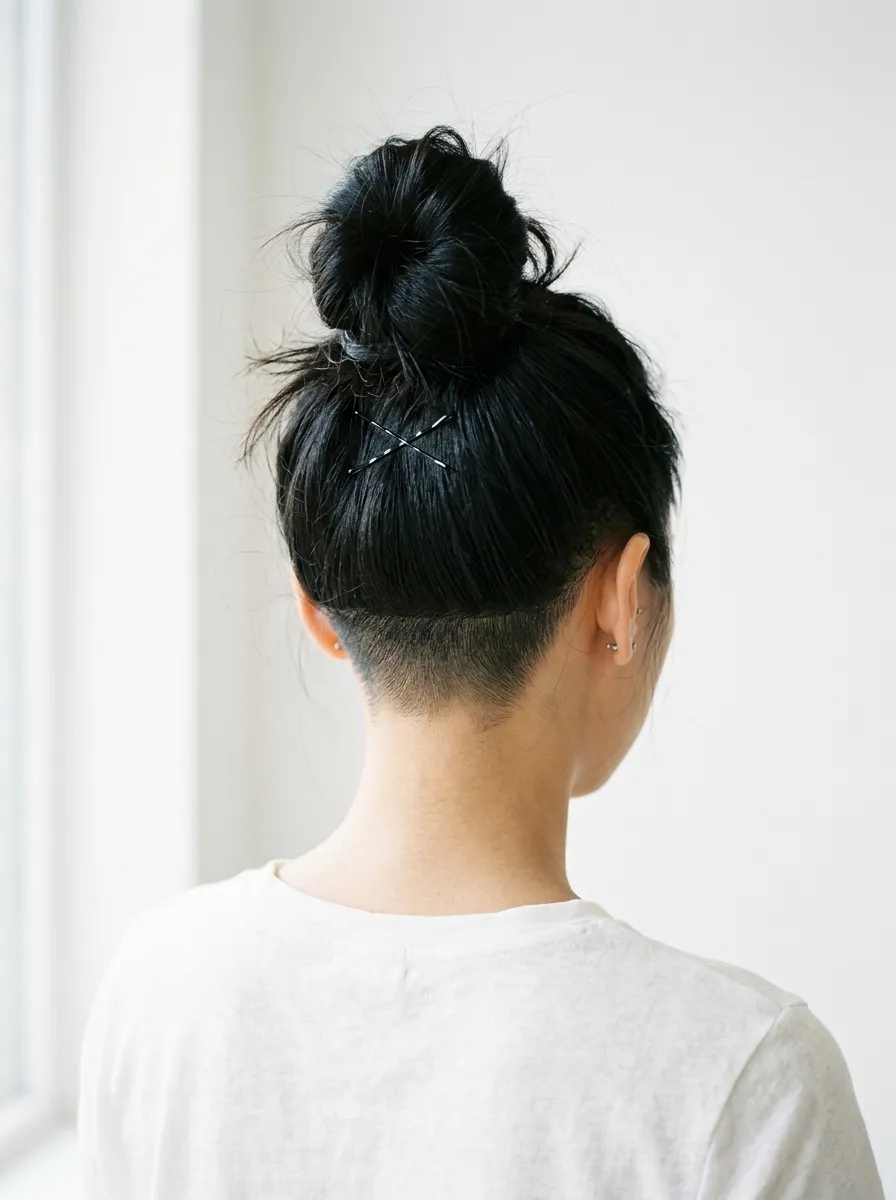
Messy Top Knot with Undercut Peek
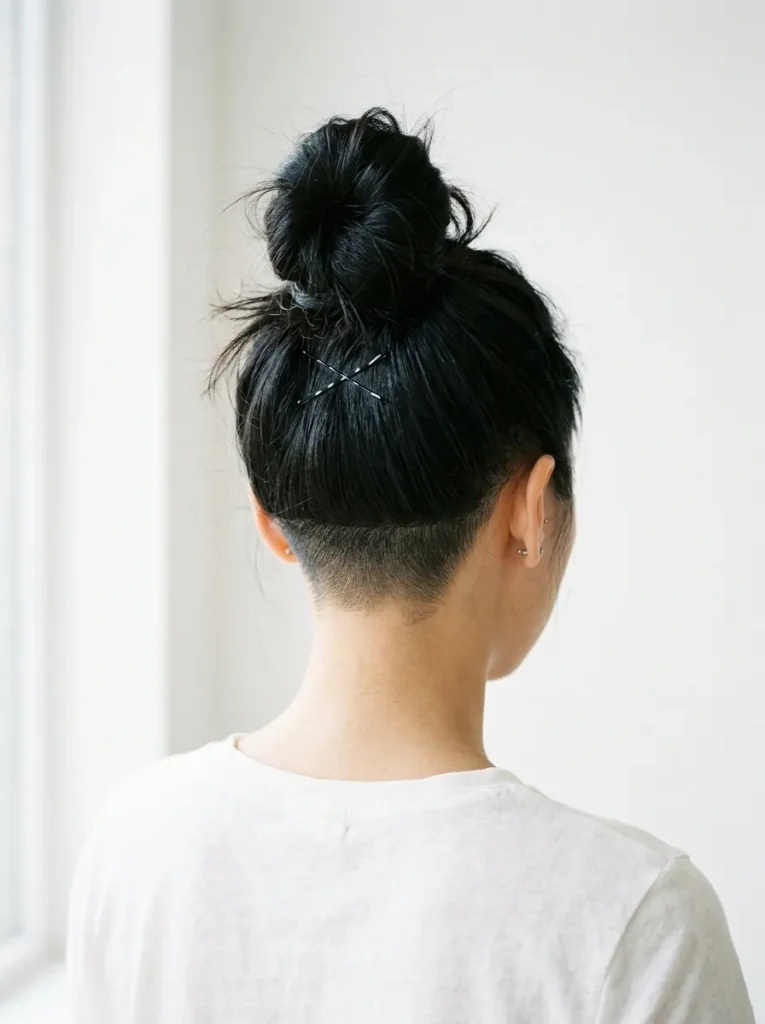
A tight, glossy top knot never survives past 9 a.m. It slips, it pulls at your scalp, and by lunch you’ve redone it twice. The grunge version skips the smoothing brush entirely.
Twist dry or second-day hair into a loose knot at the crown, letting the ends stick out instead of tucking them under. If you’ve got an undercut or shaved section underneath, let a sliver of it peek out below the knot line. Secure with two crossed bobby pins, not an elastic pulled tight.
For more low-effort shapes like this, messy bun ideas are a good place to keep building your rotation.
Slicked-Back Low Bun
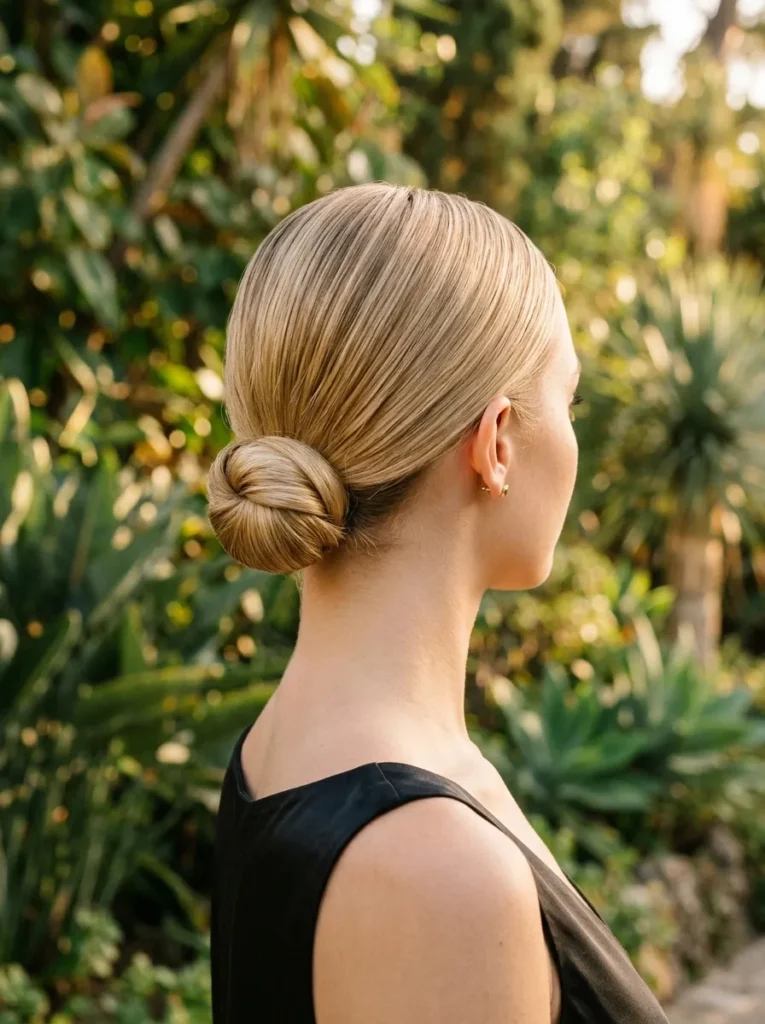
A slicked-back low bun reads sharp and a little severe, which is exactly the point. Gel or pomade pulls every strand flat against the head, and the bun itself sits low at the nape instead of high on the crown.
The look works on both clean and second-day hair, though second-day actually holds the slick finish longer since there’s more natural texture to grip. Wrap a small section around the base before pinning to hide the elastic.
This piece pairs well with the guide on how to style a low bun for any occasion if you want more base techniques.
💡 Styling Tip
Dip a fine-tooth comb in gel for a cleaner slick without product buildup.
Double Space Buns with Bandana Wrap
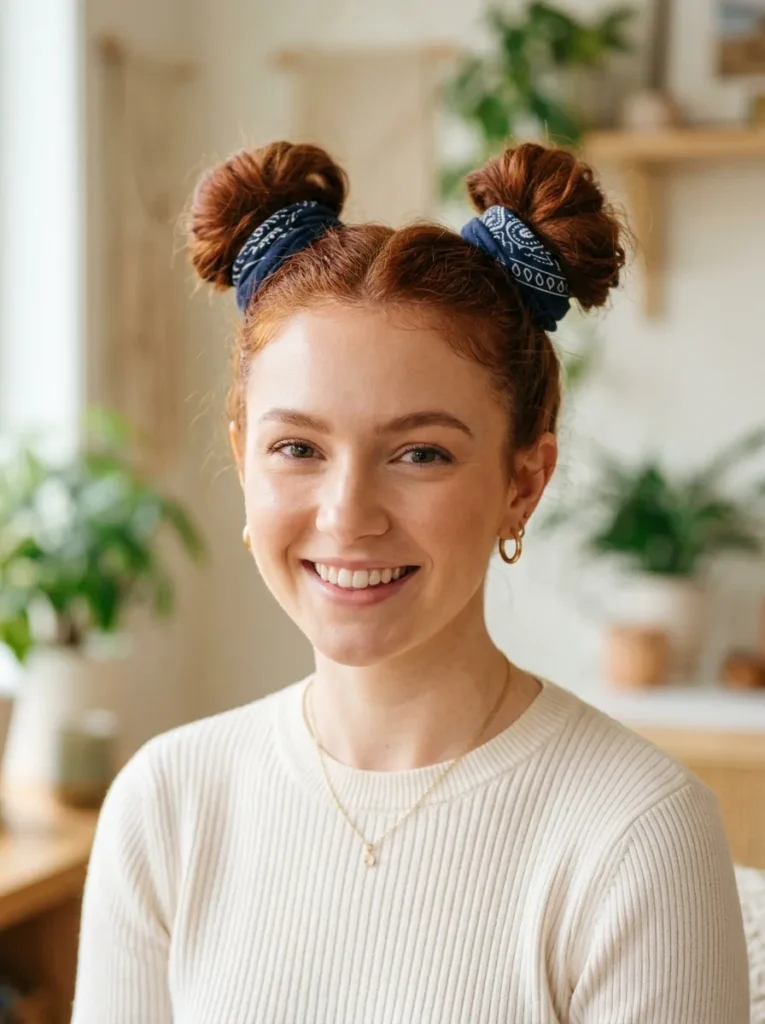
Part the hair down the middle first, then twist each side into a bun at the crown. Wrap a thin bandana around the head above the ears before or after the buns go in, letting the knot sit at the back.
Fold the bandana narrow so it reads like a headband, not a full head wrap. This style holds through humidity better than a single top bun because the weight is split in two. Fine hair benefits most here since the double buns look fuller than one large bun would with the same amount of hair.
Braided Mohawk Bun
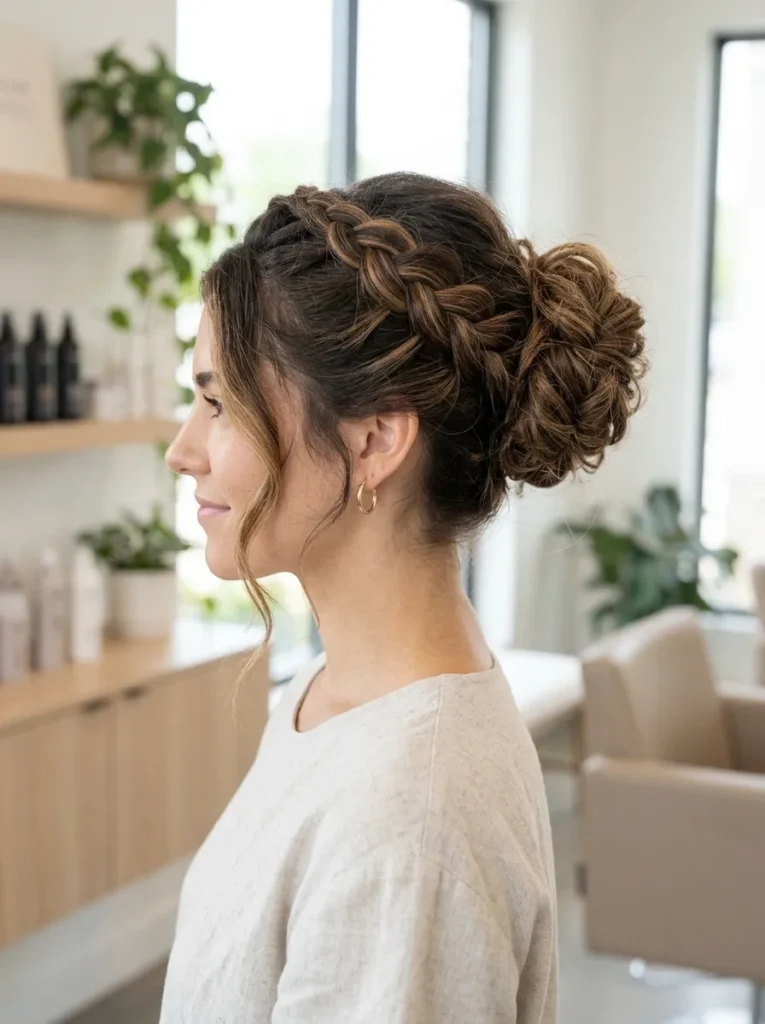
Running late and still want something that looks intentional. French braid a strip down the center of the head, from the front hairline to the crown, then gather the tail and the rest of the hair into a bun at the back.
The braid does the styling work up front, so the bun itself can be loose and a little messy without the whole look falling apart. Leave a few pieces out near the temples if your hair is shorter there. This one takes about seven minutes once the braid pattern feels familiar, less once you’ve done it a few times.
Twisted Half-Up with Safety Pin Accent
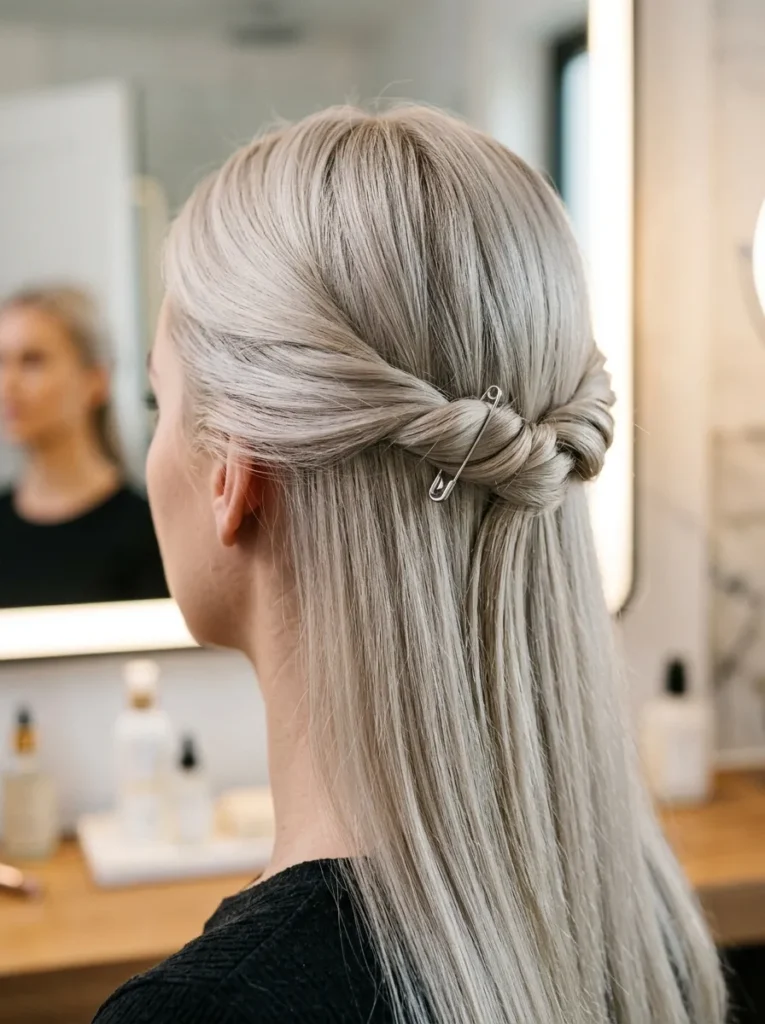
A lot of people assume half-up styles need to look neat to look finished. This one doesn’t. Take two sections from either side of the crown, twist them back, and pin them together at the center back of the head.
Leave the twists a little loose instead of tight and smooth. Slide a small safety pin through the twist as an accent, not to hold it together, only visible on top of the hair for the detail. Most people pull the twist too tight, which flattens the texture and makes it look like a plain half-up instead of a styled one.
Chunky Braided Low Bun
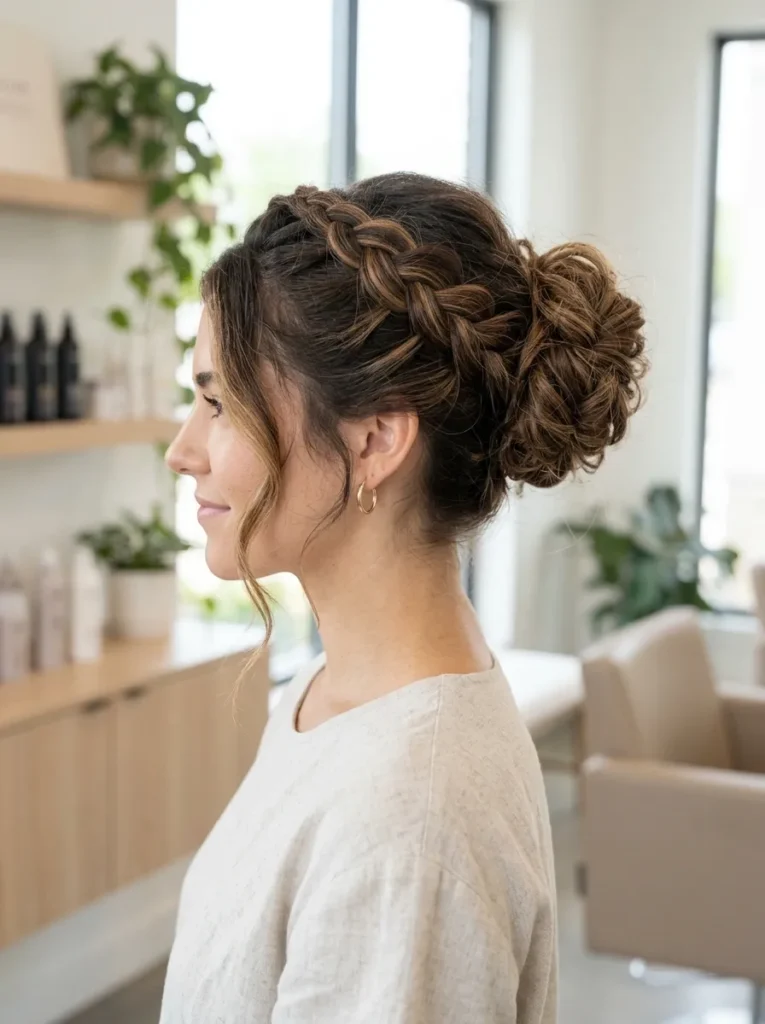
A single thick braid, not three thin ones, wound into a low bun at the nape. The chunkiness is the point, so skip a tight three-strand braid and go with a loose fishtail or a simple twist instead, then coil it into a bun and pin around the edges.
This style shows off color especially well since the braid pattern catches the light differently than a smooth section would. It’s a favorite on deeper shades like the ones in these black cherry hair color ideas, where the braid ridges pick up warm undertones under indoor light.
Wrapped Ponytail Bun with Cord
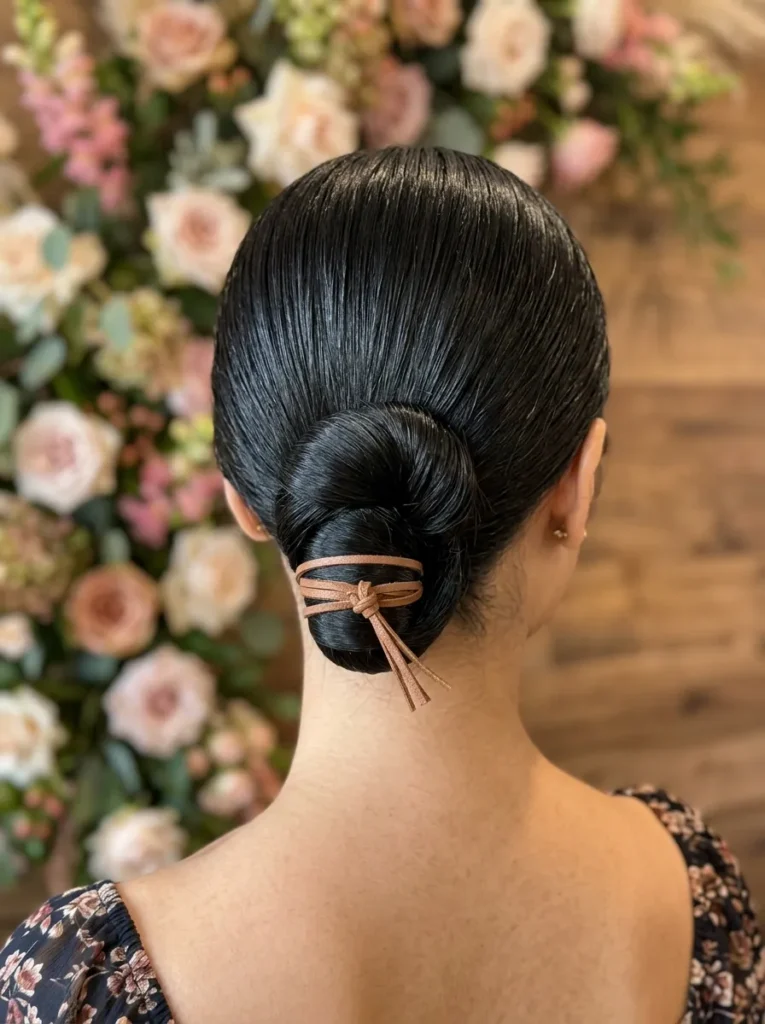
Wrap the base of a ponytail with something other than an elastic band. A thin leather cord, a strip of ribbon, or even a shoelace works, looped around the base three or four times and tied off underneath.
Once the ponytail is wrapped, twist it into a loose bun and pin the ends under. The wrap becomes part of the visible style instead of a piece to hide, which is the small rule that separates this from a standard bun. Straight and fine hair holds the twisted shape better than very curly hair, which tends to spring the bun loose faster.
Asymmetrical Side Bun
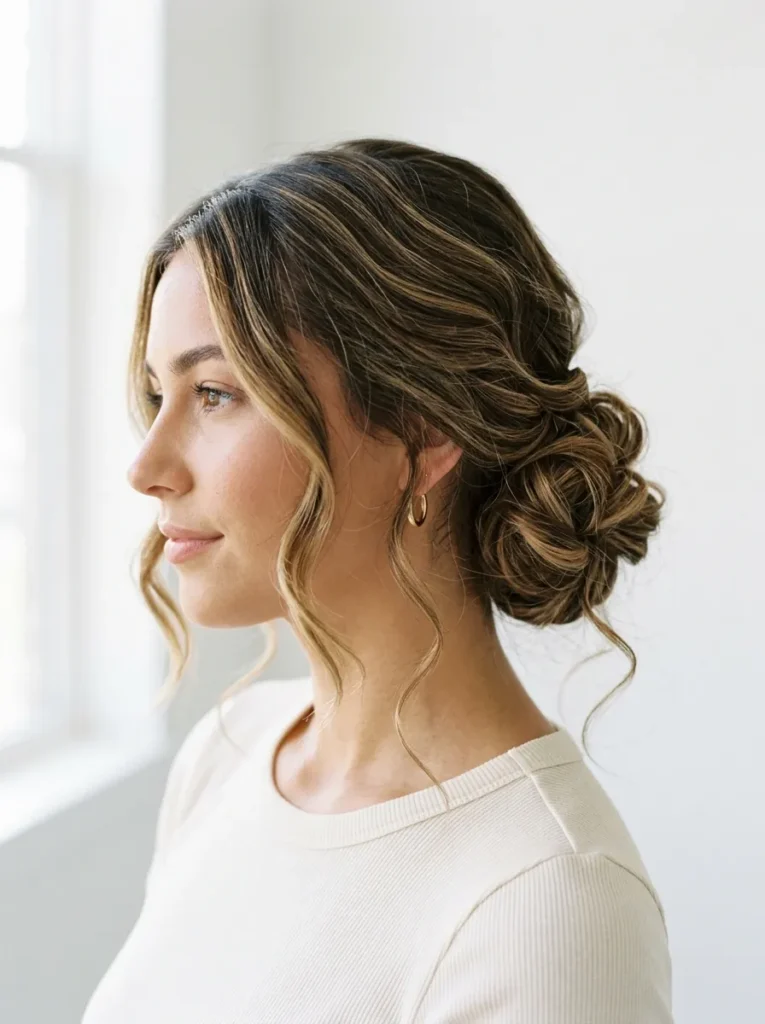
The most common mistake with a side bun is centering it too close to the ear, which makes it look accidental instead of styled. Gather all the hair to one side at ear level, twist it toward the back of the head, and pin the bun so it sits slightly behind the jawline, not directly beside it.
Leave the opposite side smoother or slightly swept back for contrast. This shape works well with an undercut on the buzzed side, since the bun draws attention away from needing to style that section at all.
What you need
Dutch Braid into Messy Bun
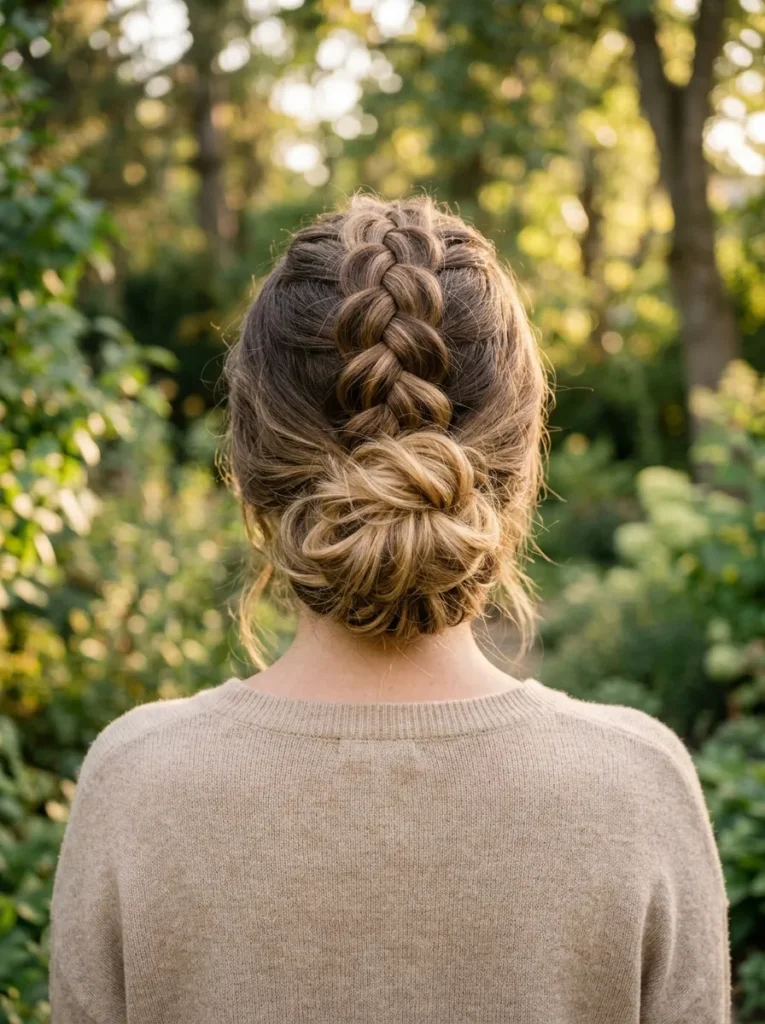
A Dutch braid sits on top of the hair instead of underneath it like a French braid, which gives it more visible texture once it’s braided into a bun. Braid from the front hairline back to the crown, then gather everything left over into a loose, messy bun instead of a tight twist.
The raised braid pattern reads more grunge than a French braid version would, since it stays visible even after the bun softens the rest of the shape. For more everyday braid options in this style, these Dutch braid hairstyles for everyday wear are worth bookmarking.
Bandana Wrapped Bun
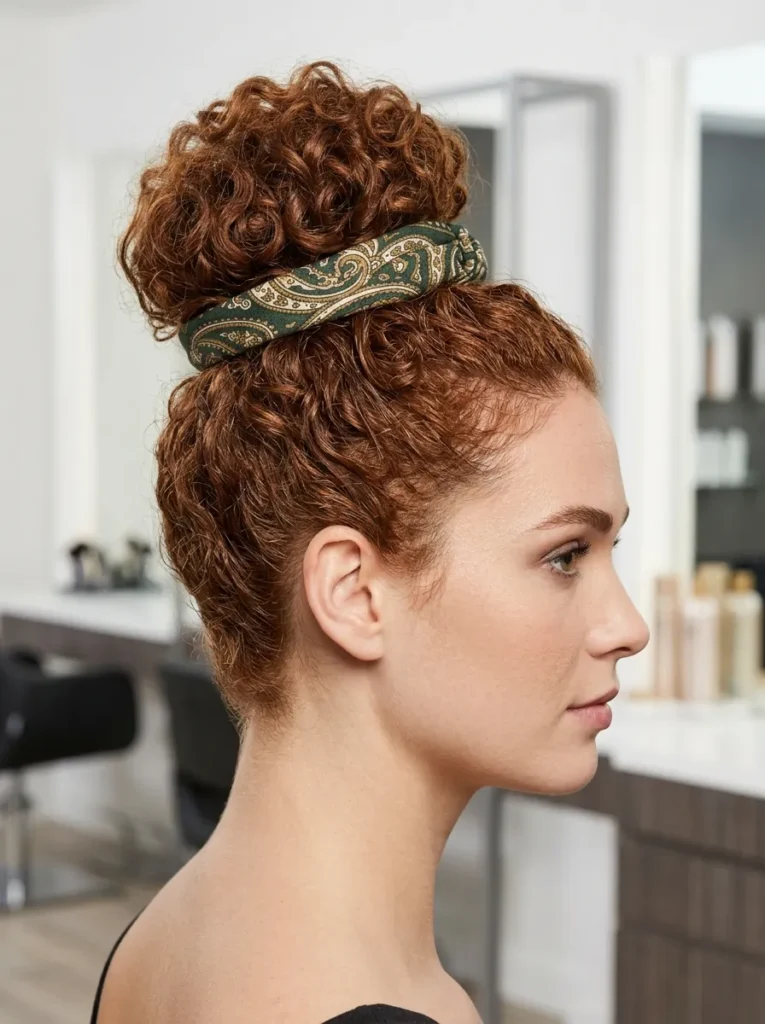
This one works best on hair with some natural wave or a day or two of dry shampoo built in, since smooth hair tends to slide out of the wrap by afternoon.
Twist all the hair into a single bun at the crown, then wrap a folded bandana around the base of the bun itself rather than around the head. Tuck the ends of the bandana under the bun and secure with a bobby pin. Curly and coily textures hold this shape the longest, sometimes a full day without a single pin adjustment.
Split Pigtail Buns with Face-Framing Pieces
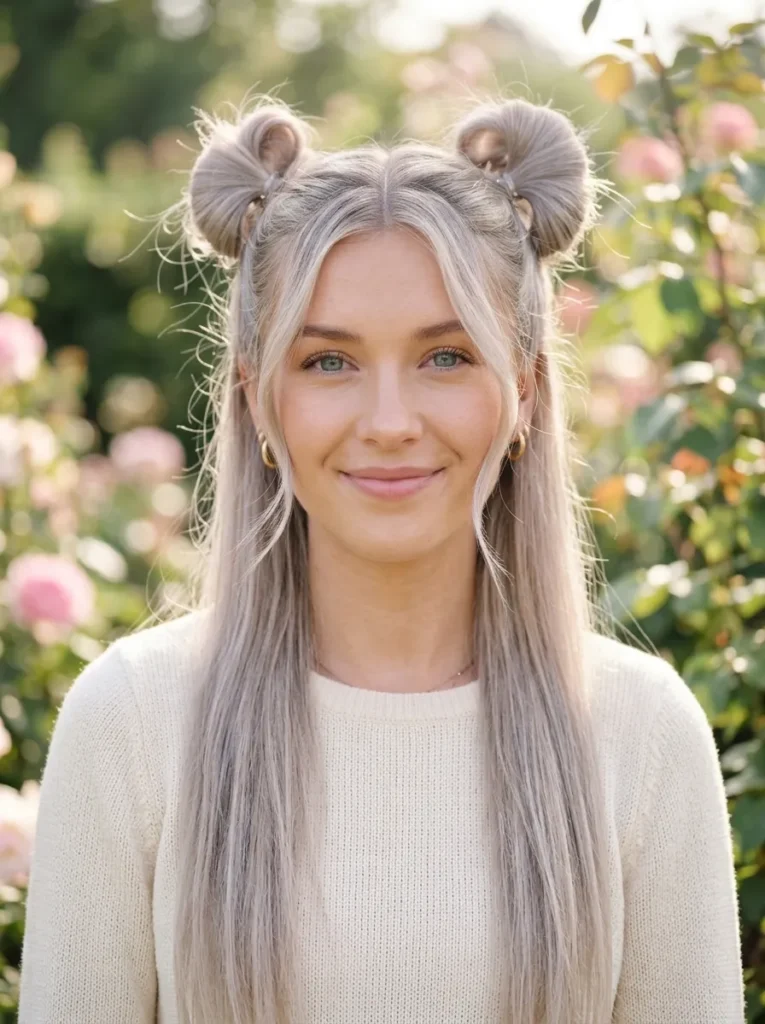
Pigtail buns can look juvenile fast if every strand is pulled back tight. Pull two even sections above the ears, twist each into a small bun, and before pinning either one, pull a few pieces loose around the face.
Wispy pieces at the temples soften the whole shape and keep it from reading like a school photo style. If you already wear shorter face-framing layers, these wispy bangs looks for a soft modern vibe show a few ways to work them into an updo like this one instead of always wearing them down.
Two tight, matched buns pulled straight back.
Loosened buns with soft framing pieces left out.
Twisted Crown with Shaved Sides
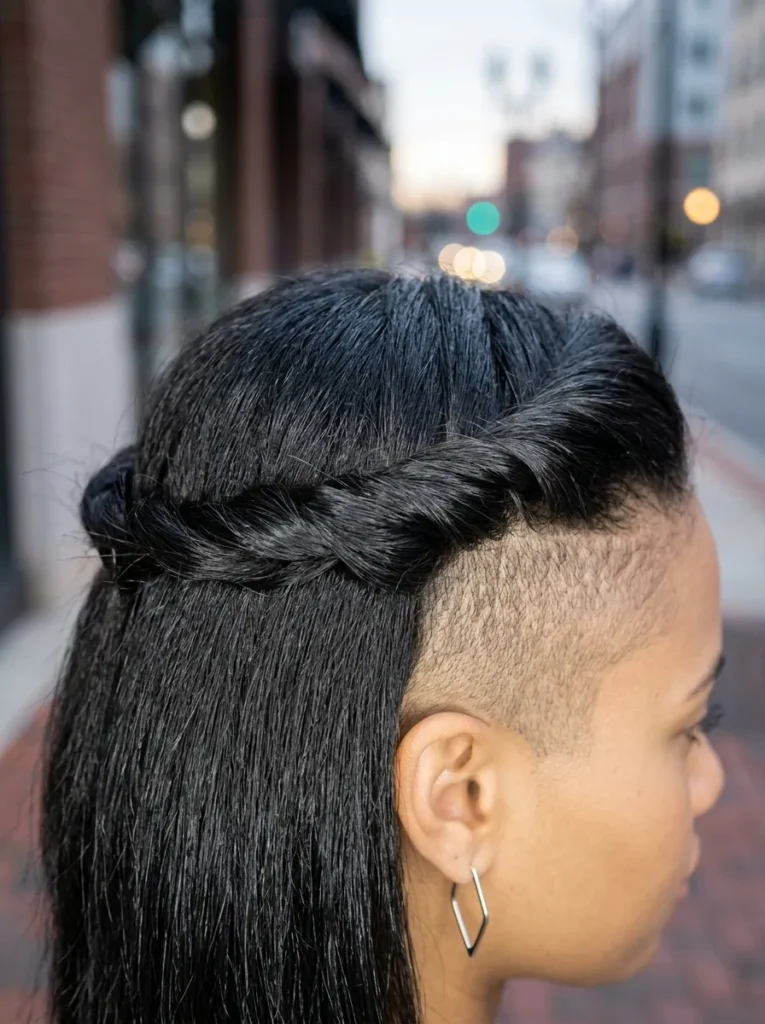
A twisted crown shows off shaved or buzzed sides instead of covering them, which is the whole appeal if you’ve already got that cut. Take two sections above each ear, twist them toward the back, and pin them where they meet at the crown, leaving the rest of the hair down or in a low bun underneath.
The twists sit close to the head, so the shaved sides stay fully visible the entire time instead of getting hidden under loose strands. In my experience, a texturizing spray before you start makes all the difference in keeping the twists from slipping.
Textured Knot with Crossed Bobby Pins
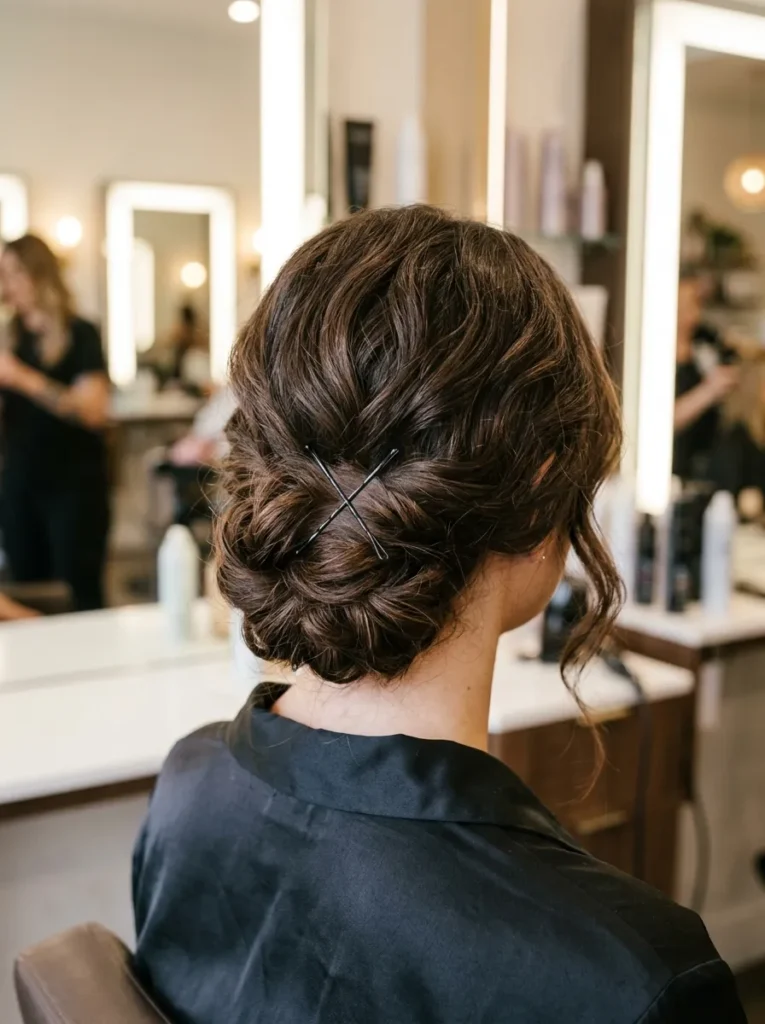
Twist the hair into a loose knot at the back of the head, lower than a top knot but higher than a nape bun. Instead of hiding the pins, cross two bobby pins in an X shape directly over the front of the knot where they’re visible.
Use pins in a metal tone that contrasts with the hair color for more effect, gold on dark hair or silver on warm tones. This works fastest on hair that’s already a little textured from a day without washing, since the knot holds its shape without extra product.
Loose Bubble Bun
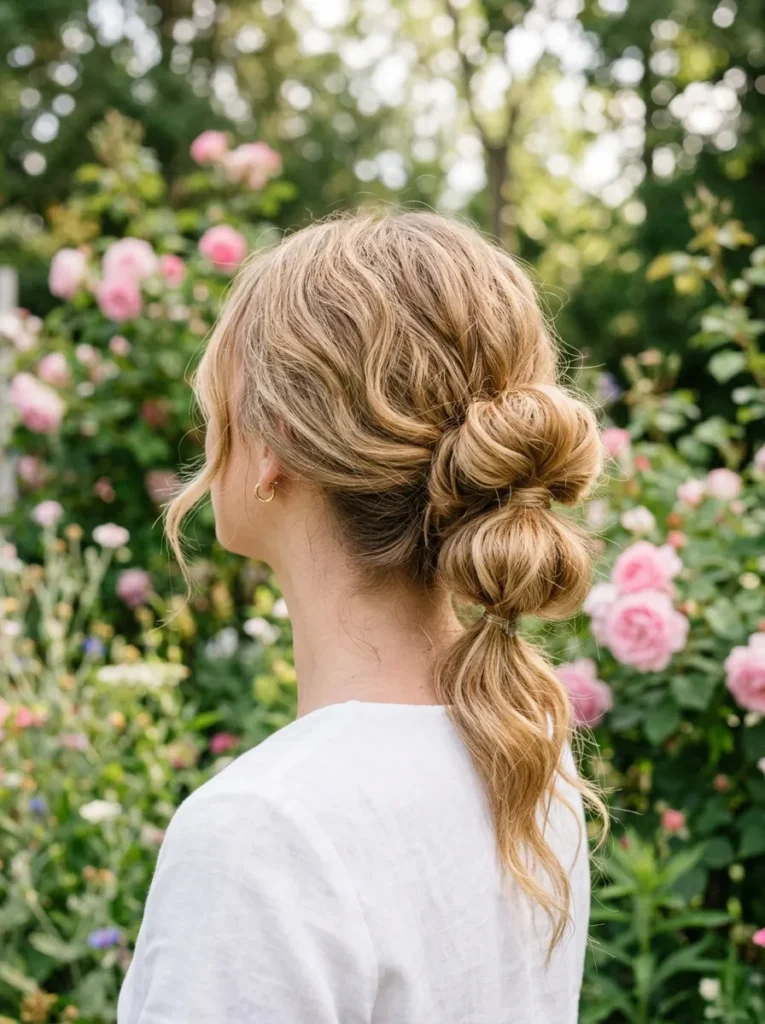
Getting ready between a shift and a show and don’t have time for a full braid pattern. Pull the hair into a low ponytail, then wrap small elastics every two inches down the length before twisting the whole thing under and pinning it into a bun.
Gently tug each bubble section to loosen it once it’s in place, so the bun reads soft and rounded instead of stacked and tight. The bubbled sections give the illusion of more volume than the hair actually has, which matters most for finer textures.
Rope Twist Low Bun
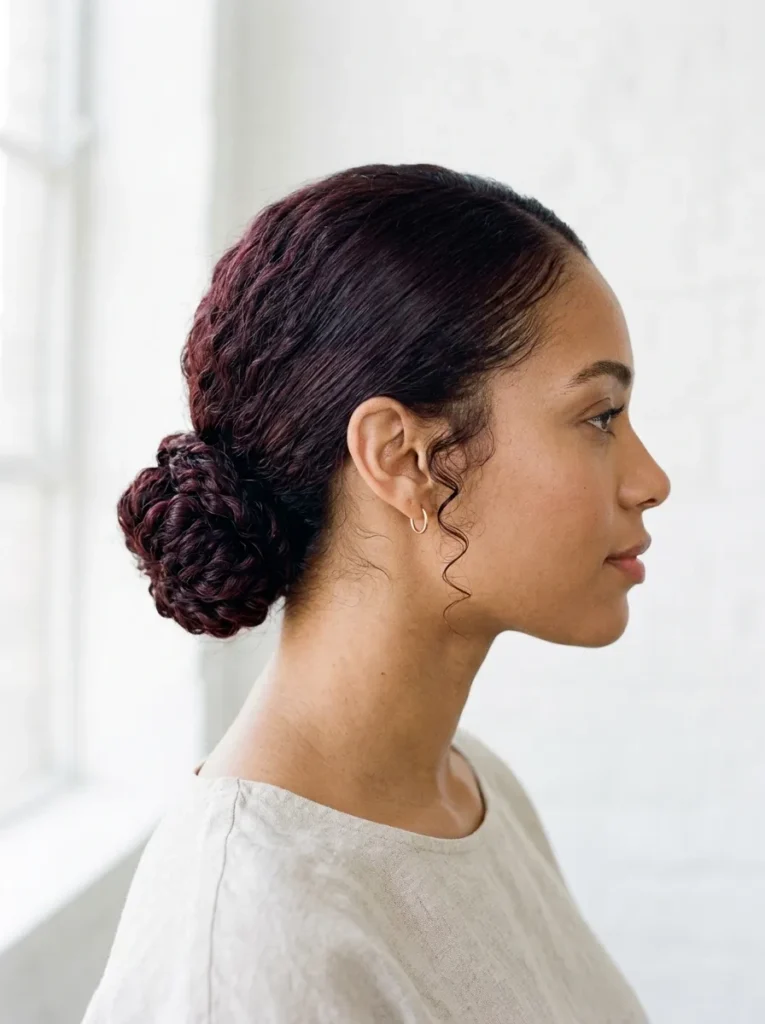
A rope twist bun doesn’t need silky, freshly washed hair to look good, despite what most smooth-hair tutorials suggest. Two-strand twist a low ponytail tightly enough that it coils on itself, then wind the coiled rope around the base and pin it flat.
Texture actually helps this style hold since the twist grips itself instead of slipping loose the way freshly washed hair does. This is one of the easiest finishing styles to end the list on, since it takes under five minutes once the twist itself is done and needs almost no extra product to set.
Final Thoughts
Alt and grunge updo styles work because they don’t ask for perfection. A loose twist, an exposed pin, a wrap instead of an elastic, all of it reads as intentional once you commit to the shape instead of fighting the texture your hair already has.
Some of these styles take five minutes, others closer to fifteen once you add a braid or a wrap, but none of them need a mirror check every hour. Test a few on different hair days and see which shapes hold best for your texture and length.
Save this list for the next time you want your hair to look a little undone on purpose.
Frequently Asked Questions
Do grunge updos work on clean hair?
They work better on second-day hair, which has more grip. On clean hair, add texture spray or dry shampoo first so pins and bands hold.
What pins suit a grunge updo?
Visible pins are part of the look. Safety pins, exposed bobby pins, and thin metal cuffs all fit, and they hold the shape without hiding the detail.
Can I wear a grunge updo to work?
Yes, if you keep the shape tidy. A low twisted bun or a wrapped ponytail reads as intentional, while looser pieces suit weekends and evenings.
How do I keep a grunge updo from falling apart?
Pin into the base of the twist or bun, not the surface, and cross two pins for grip. A light spray holds the shape without making it stiff.
Do grunge updos suit short hair?
They do. Small space buns, half-up twists, and pinned-back sections all work at bob length, and shorter hair makes tighter, neater shapes.